# Installing Automations
We've made it incredibly easy to install automations from right from the Marketplace.
We see Sleuth Automations as part of continuous improvement *experimentation platform*, so we understand how important is to enable teams to quickly try out an automation, see if it's working for them, and then quickly move on to trying out additional automations.
The install process varies slightly depending on the [automation type](https://help.sleuth.io/sleuth-automations/automations-marketplace/..#automation-types), but all automations share the the following easy-install features:
* All automations can be installed (and also [edited or uninstall](https://help.sleuth.io/sleuth-automations/automations-marketplace/editing-and-uninstalling-automations)ed) from completely from within Sleuth's UI.
* The install process will never require issuing a PR or otherwise modifying your code repositories
* The install process allows you determine a specific Team or Project to which an automation will apply
{% hint style="info" %}
Most automations can be applied to either a Project or a Team, but some are limited to one or the other.
When installing an automation to a Project, the automation will apply by default to all Code Deployments within that Project, but some automations provide a configuration option for limiting their scope to specific Code Deployments within the selected Project
{% endhint %}
{% hint style="warning" %}
In order to use automations that update PRs in your Git provider, you'll need to make sure you've enabled "write" permissions for that Git provider within Sleuth.
{% endhint %}
To install an automation in your sleuth environment, follow these steps:
* [Browse the Marketplace](https://help.sleuth.io/sleuth-automations/automations-marketplace) to find an automation you'd like to install
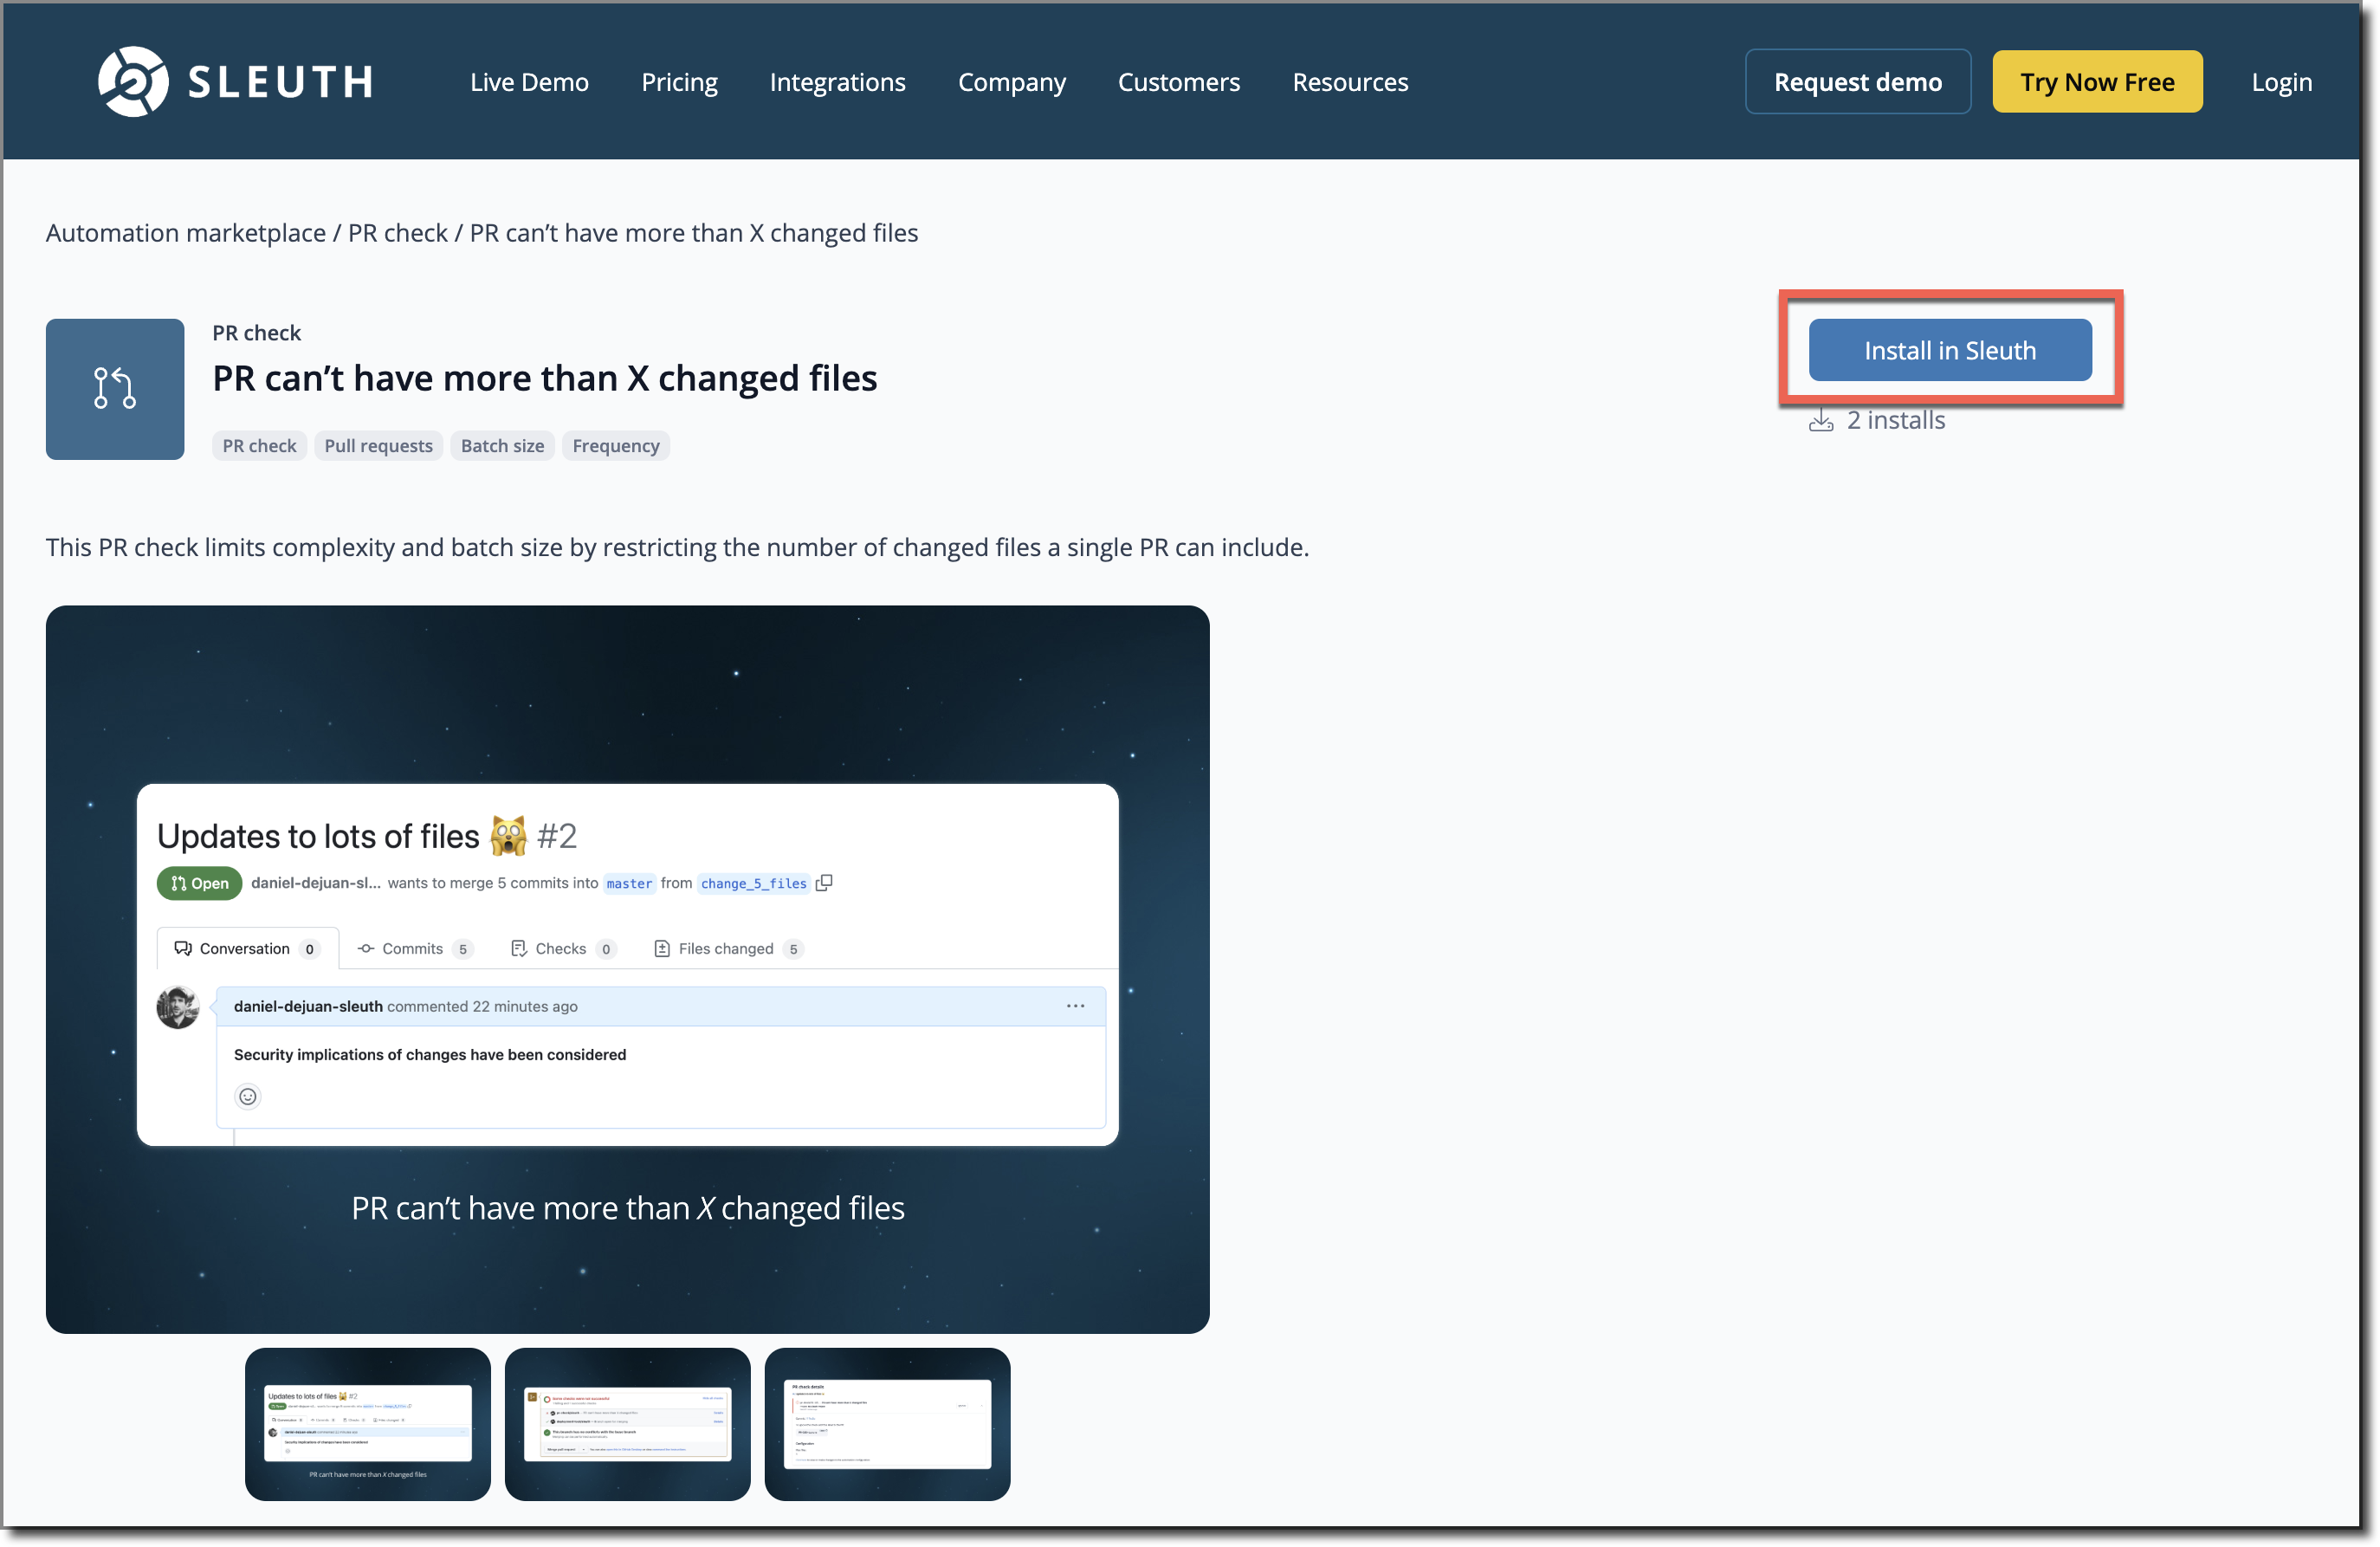
* Click on the automation card to view additional details about the automation
* Click **Install in Sleuth**
* The next page allows you pick a Project or Team for the automation and might prompt for further configuration parameters depending on the specific automation. In this PR check example, Sleuth is asking for the maximum number of files allowed on a single PR. Other common parameters might include a Slack channel for sending notifications, an Environment selector for determining which environments an automation applies to, etc.
Installing and configuring a PR check automation
* Once all required fields have been specified, click **Install and continue**
* Sleuth will display a toast indicating that the installation was successful, and the installed automation now appears under the **Automations** item in the left-hand-navigation pane for the selected Project/Team.
Viewing installed automations for a specific Project