Quick Start Guide

Create your first AI asset, install it to a target, and verify it runs. This walkthrough takes about 10 minutes and covers setup, asset types, asset discovery, and asset distribution.

This guide walks you through the end-to-end loop: create an account, wire up the sx CLI, publish an asset, install it to a target, and see it show up in a Claude Code (or any other supported client) session.

1. Set up your account

  1. Go to skills.newarrow-up-right and sign in with Google, GitHub, SAML, or an existing Sleuth DORA account.

  2. On first login, Sleuth Skills creates an Organization for you. Everything in the product — assets, teams, repositories, bots, audit events — is scoped to one organization.

  3. Invite teammates from the John Admin → Organization menu. Anyone you invite can sign in and start consuming assets immediately; admin actions like creating teams or publishing org-wide installs are gated by role.

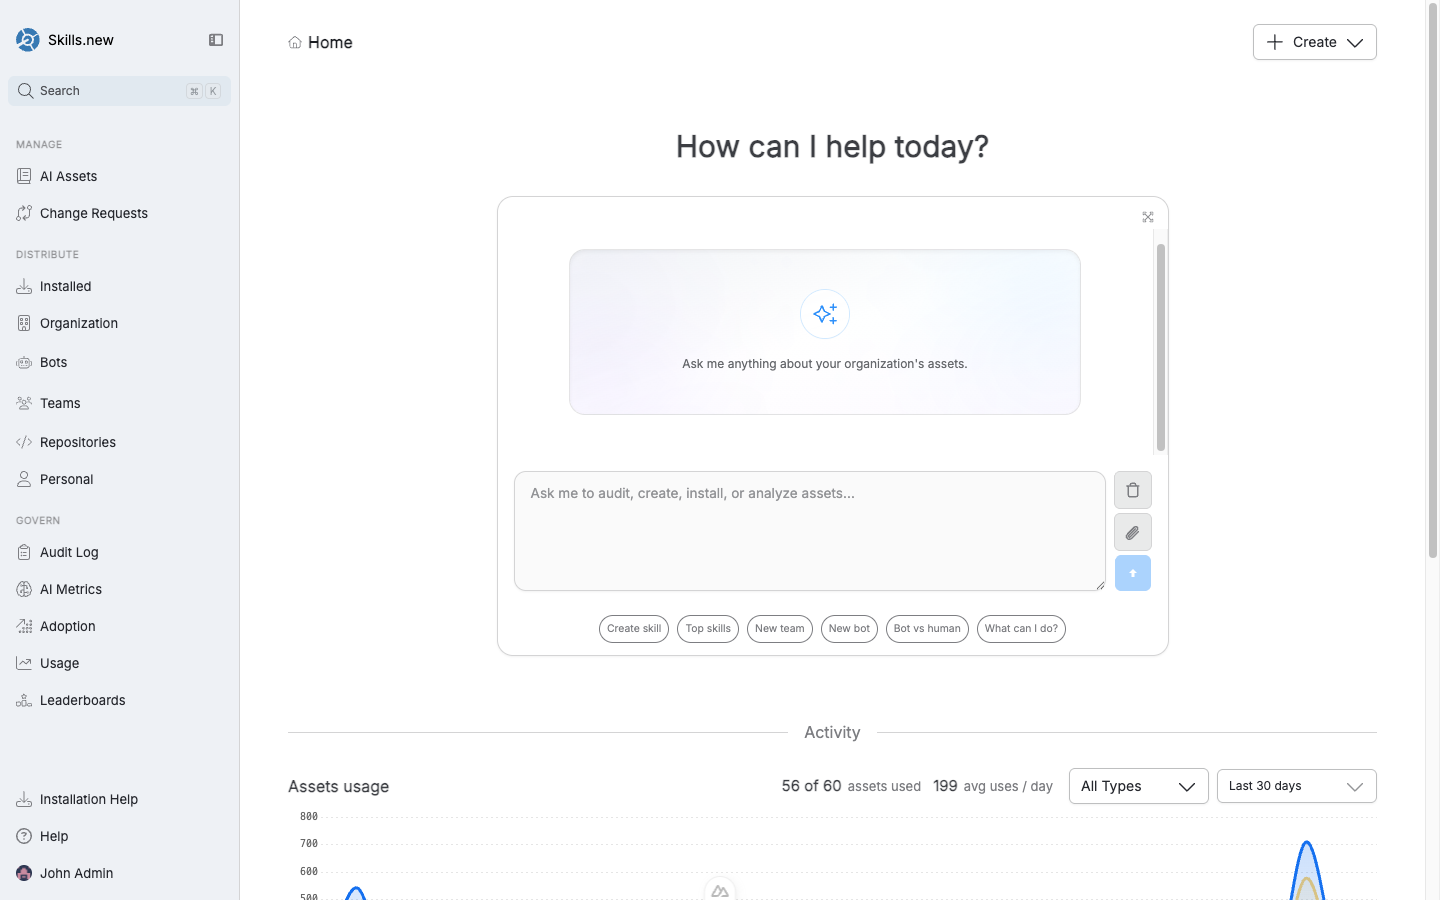
After sign-in, the home page shows recent activity and a natural-language assistant for discovering, creating, and auditing assets.
2. Install the sx CLI

Skills.new is the hosted vault; sxarrow-up-right is the command-line runtime that distributes assets onto developer machines. You need both: the UI to manage and govern, the CLI to install.

Then point sx at your Sleuth Skills vault:

This stores an auth token under ~/.config/sx/ and registers the vault so that sx install and sx add know where to talk to.

3. Understand asset types

Every artifact you publish to Sleuth Skills is an asset with a type. Each type targets a different part of the AI client's configuration surface.

Type
What it is
Example

Skill

A named capability with a prompt, metadata, and optional bundled files. Triggered by the model when its description matches.

django-admin_skill — how to scaffold Django admin pages.

Rule

Coding standards or constraints that auto-apply based on file path or project context.

testing — always use pytest with fixtures; mock externals with vcrpy.

Agent

A self-contained autonomous worker with a goal.

reviewer — reviews a branch with senior-architect rigor.

Command

A slash command the user invokes explicitly.

/flush-toilet — prints ASCII art.

Hook

Automation triggered by client lifecycle events (pre-prompt, post-tool-use, etc.).

hi — logs a greeting to log.txt.

MCP server

A Model Context Protocol server definition the client launches.

hi-dylan — returns "Hi Dylan!".

Claude Code plugin

A bundle of skills, commands, hooks, and MCP configs shipped as a single unit.

claude-code-plugins — team-wide plugin bundle.

Each type has its own definition format. See Manage for the full breakdown.

4. Discover existing assets

Before creating anything new, it's worth seeing what is already published in your org (and what's available in the wider community).

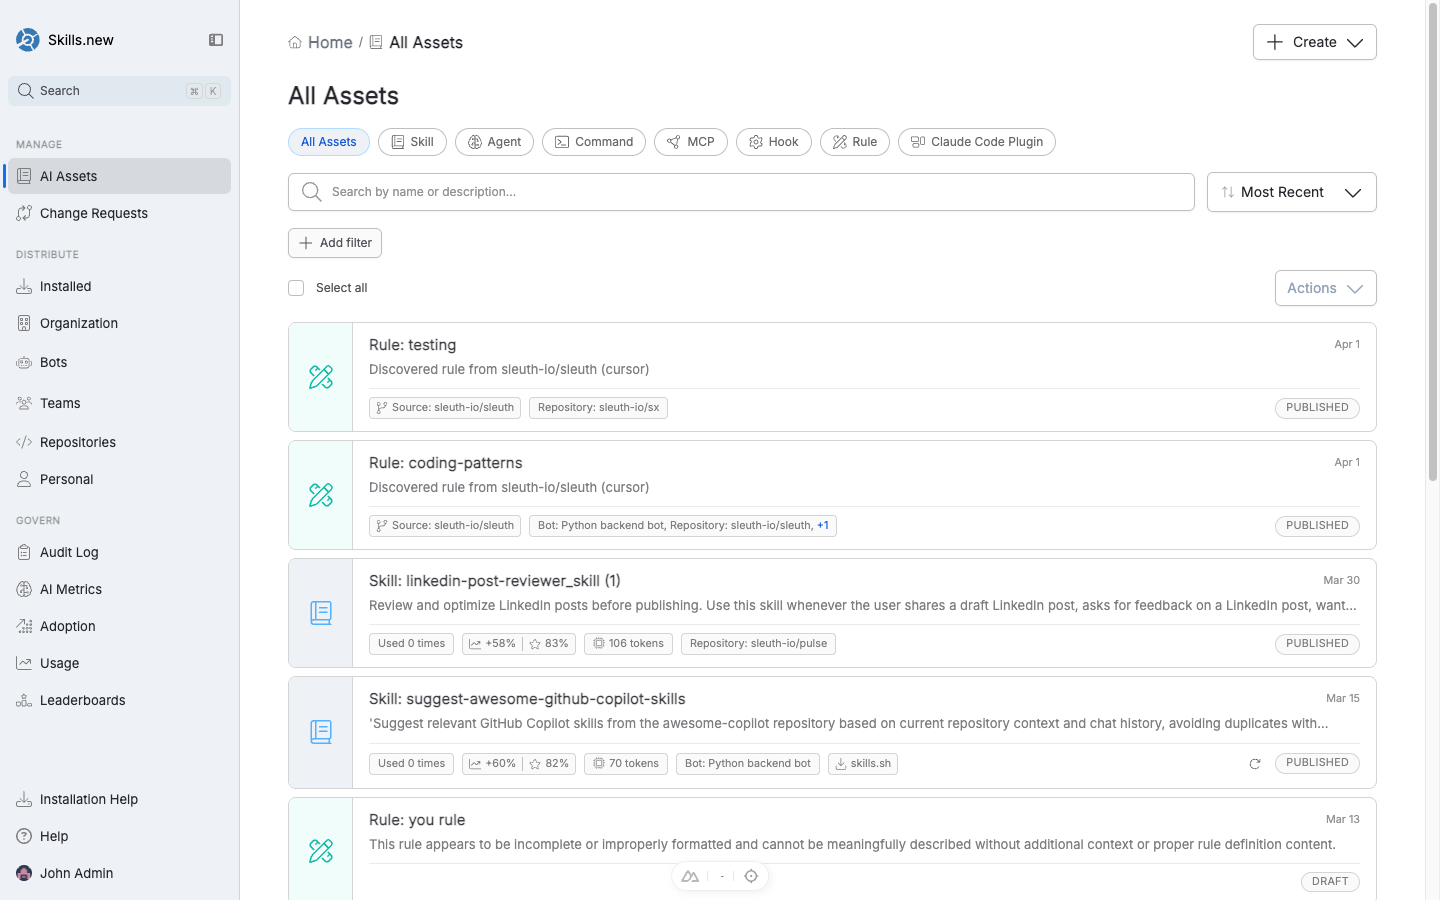
The AI Assets list, filtered by type. Each row shows usage count, token cost, and publication status.
  • Automatic GitHub scan. When you connect a GitHub repository to Sleuth Skills, the app scans it for assets that already exist in the code — .claude/ skills, .cursor/rules/, claude-code-plugin bundles, hooks, and the rest. Anything it finds shows up in AI Assets tagged with the source repository so your team can adopt, promote, or retire it from the UI without having to re-publish by hand.

  • In the UI: click AI Assets in the left nav. Filter by type (Skill, Agent, Command, MCP, Hook, Rule, Claude Code Plugin), by source (which repo it was discovered from), or search by name.

  • From the CLI: run sx add --browse to search skills.sharrow-up-right, a community directory of 85k+ agent skills, and pull one into your vault.

5. Create your first asset

The fastest way is the home-page assistant — type a goal and it will draft the asset, ask you a few clarifying questions, and save it as a draft in AI Assets. You can also create directly from the Create button in the top-right of any page, or via sx add /path/to/your-skill from the CLI.

Once saved, an asset starts in Draft; publish it when you're ready for teammates to see it.

6. Pick an installation target

An asset exists as a definition until you install it somewhere. Installation targets are the domain model Sleuth Skills uses to answer "who gets this asset?":

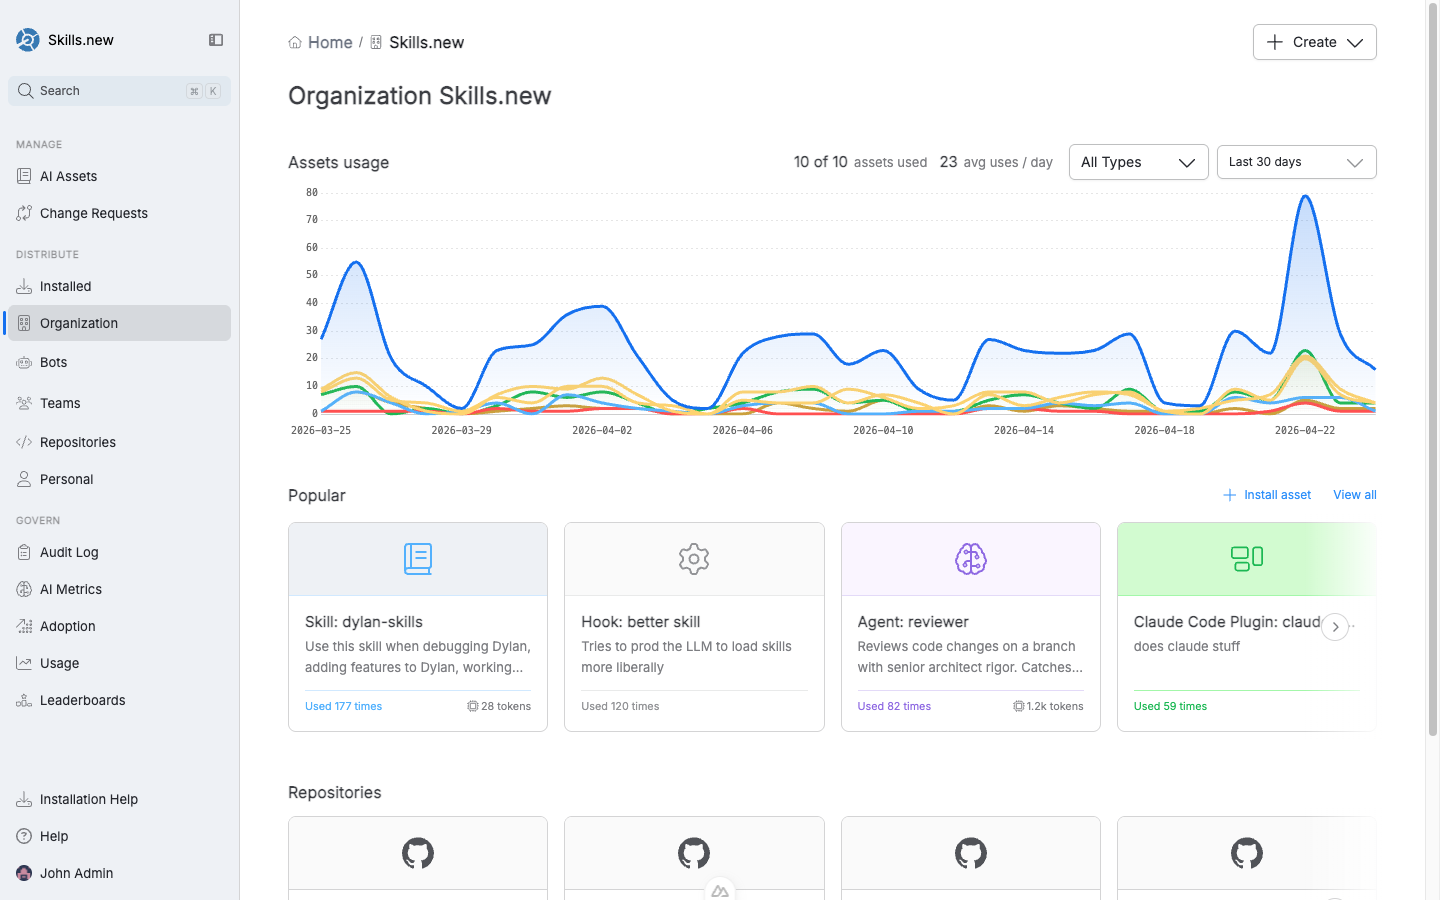
The Organization view — the root container for every asset, team, bot, and repository in your Sleuth Skills vault.
  • Organization — everyone in the vault.

  • Teams — a group of members and repositories; installs cascade to all members and repos on the team.

  • Repositories — a specific git repo; installs apply only when sx install runs inside a clone of that repo.

  • Bots — service accounts that can be added to teams and installed against directly.

  • Personal — an individual user; they can install their own assets globally without affecting anyone else.

See Distribute for the detailed semantics.

7. Distribute and verify

From an asset's detail page, click Install asset and pick a target. sx resolves the install set on the next run:

To preview what would be installed for the current repository and your git identity without actually writing anything, run:

A successful install shows one line per asset in the form name==version # type; scope=.... The asset is now on disk in the right client directory (e.g. .claude/skills/) and will be available the next session.

8. Govern adoption

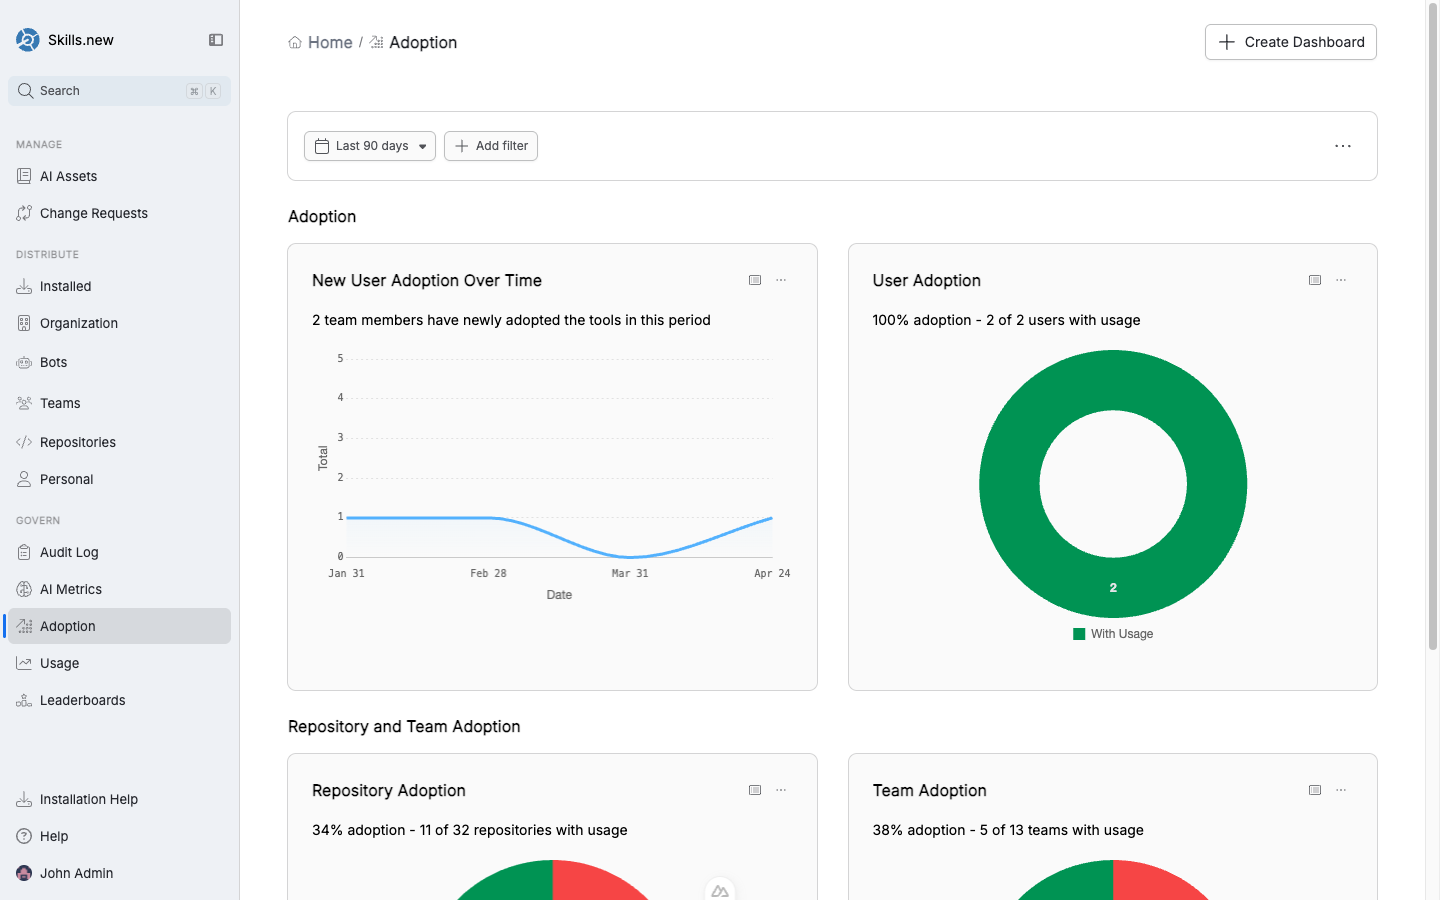
Once assets are running, the Govern section in the left nav tells you whether anyone actually uses them.

The Adoption dashboard — new users over time, team-level and repository-level adoption rates.
  • Audit Log — every install, uninstall, team change, and asset publication. Exportable as CSV.

  • AI Metrics / Adoption / Usage / Leaderboards — pre-built dashboards for common questions. You can clone any of them into a custom dashboard.

What next?

  • Wire a team so new joiners inherit the right assets automatically.

  • Add a bot so CI or an agent loop gets its own curated asset set.

  • Set up scope filters for a monorepo.

Last updated

Was this helpful?